
Well guys, since we are considering putting our pictures as an opening or credits as wanted posters, I did a little experiment tutorial, so here we go. First here's my picture. Make sure you double click on the background layer to unlock it, call whatever you like.
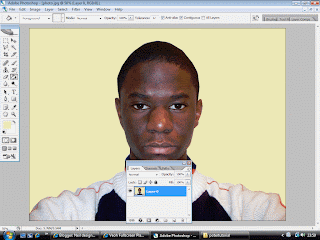
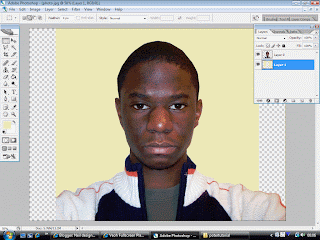
Cut around your pic then, delete it. Next you colour the cut out selection, MAKE SURE YOU CREATE A NEW LAYER for the colouring, if you want to change the colour. Next use the rectangular marquee tool to cut the edges.
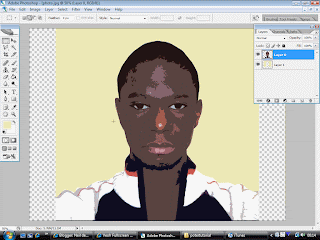
Alright to get this, go to filter at the top, then go to artistic, then cut-out. Mess around with the edge simplicity, edge fidelity and number of levels. I only touched number of levels and put it on number 5 because It brings out those highlights and I plan to cut them out.

Alright to get this, I used the magic wand tool to select all those highlights, including some on my jumper. MAKE SURE YOU ARE ON YOUR LAYER PICTURE. Afterwards go to image-adjustments-Hue/Saturation. Slide the Saturation all the way to -100. Use the magic wand tool to select the dark areas and the colour them black. It's optional though. Which you think looks better?


No comments:
Post a Comment